
Stop MU on conveyor by stopper
How can I prevent a jumping MU on a (guided) conveyor?
For this I used the invisible conveyor system from your demo project "Guided Transport".
The MU stops at the stopper but starts jumping up and down immediatetly.
Is there an easy way to prevent this?
I played around with the Rigidbody parameters and realised it stops if I activate "Is Kinematic". I guess I could do this by writing a scripts that activates this parameter at collision with transport layer.
Antwort

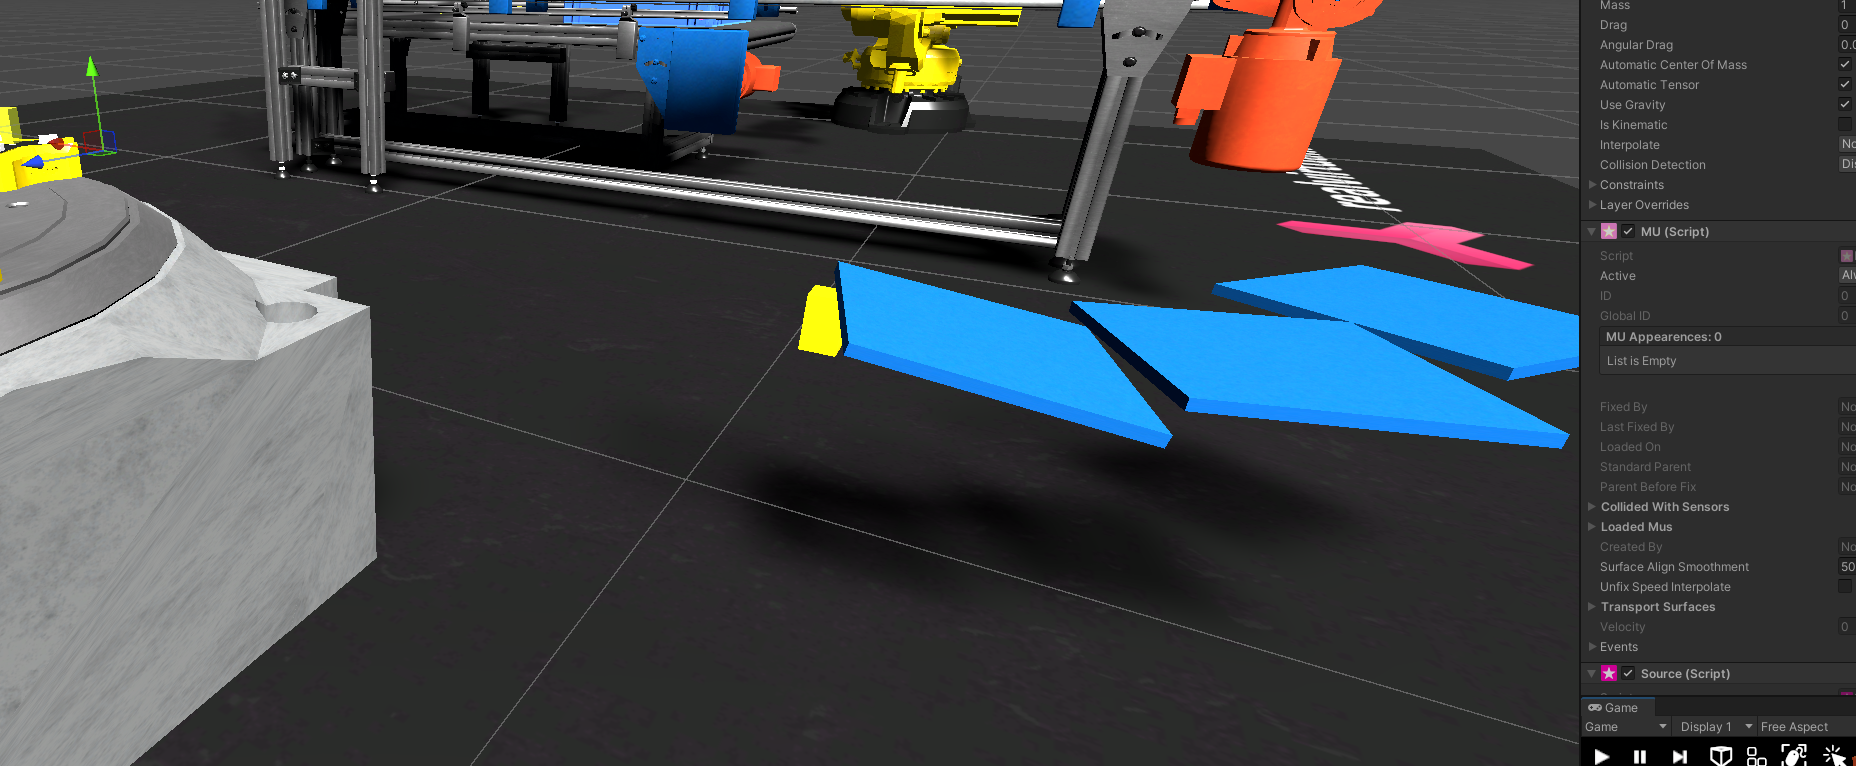
As can be seen in the illustration, the part jumps onto the stopper because the stopper pushes the part upwards and at the same time the rigid body joint tries to keep the part on the projected line on the conveyor surface.
To avoid this, the stopper should collide with the side edge of the workpiece and act as a barrier to movement along the motion axis. In more specialized applications, the collision stopper and the collision part should be placed on separate layer in the collision matrix.
With kind regards, Viktor
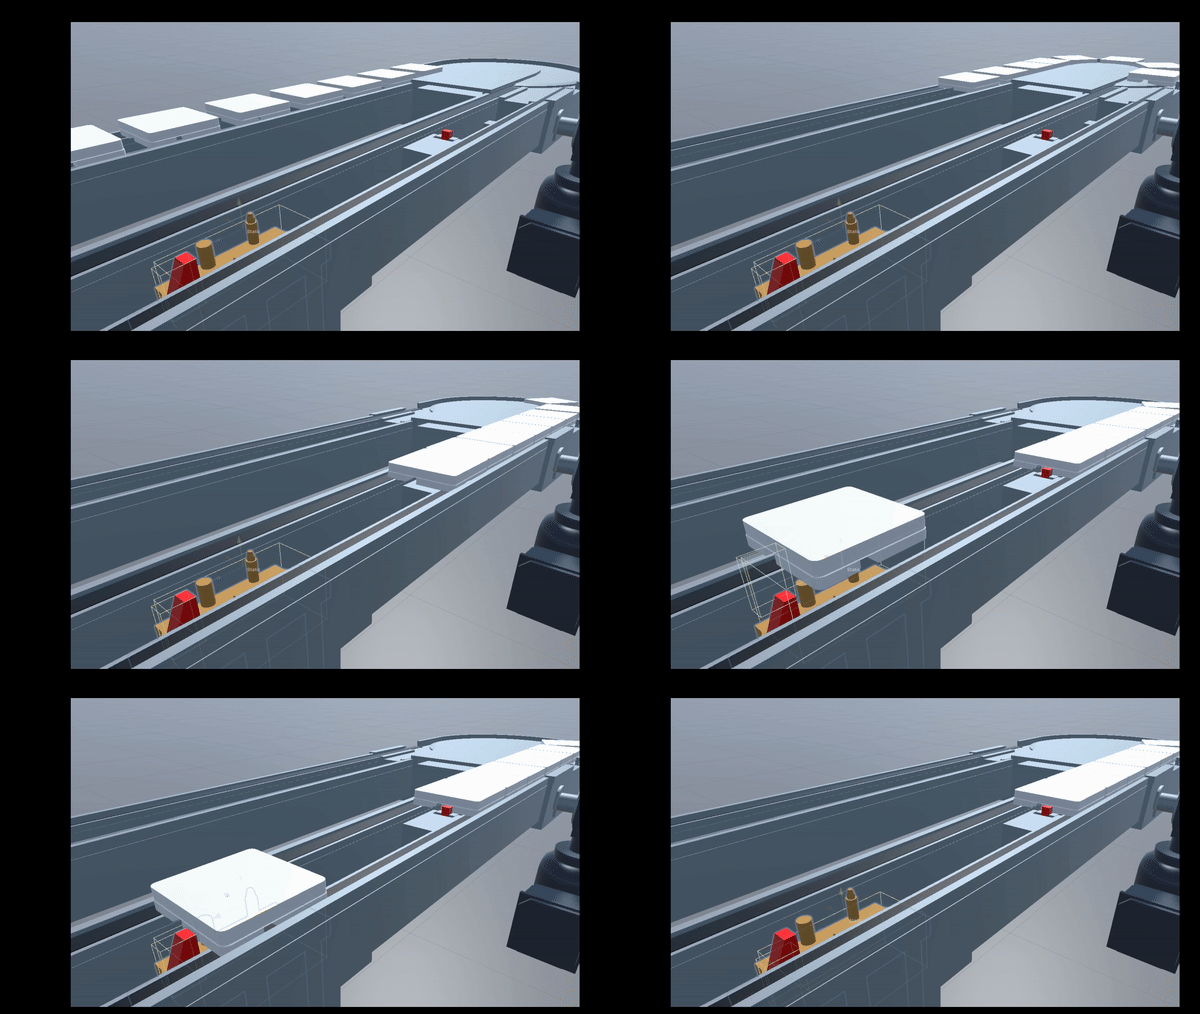

Thank you for you reply, Viktor.
Your video shows exactly what I am trying to achieve.
It works with only one MU on the conveyor but with several MUs in a row they're starting to jump around on each other when blocked by the stopper.
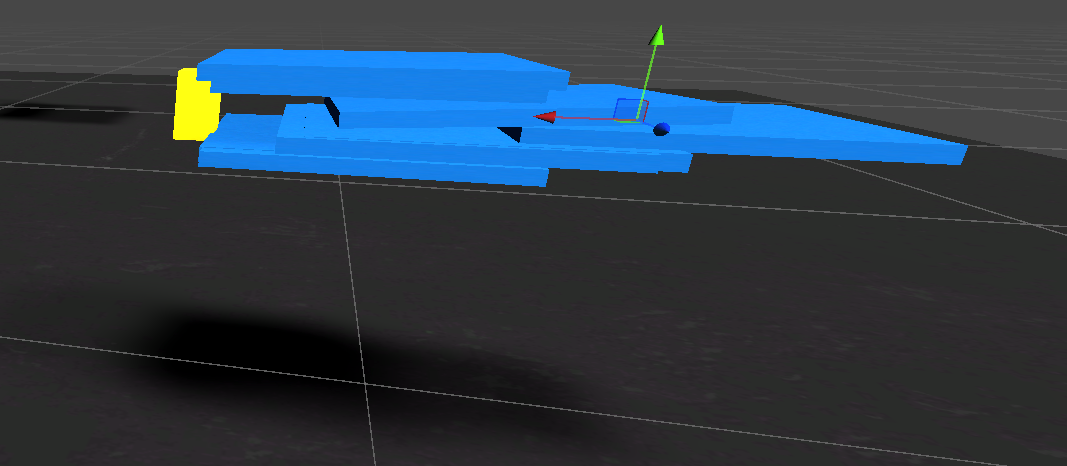
The stopper is on layer rvTransport and the MUs on layer rvMU.
Did you change "Box Collider" or "Rigidbody" properties in your example?

Maybe you should check the collider on your MUs. Is it a box collider. Maybe making it bigger (in height) might help.

I just realised your reply, thank you.
Adjusting the height did help a bit but if there are a lot of MUs in a line, they are still jumping on each other.

Hallo,
anbei die Antworten zu Ihren Fragen:
Im Umlaufsystem stapeln sich die WTs ab einer Staulänger von 4 Wts. Wie kann ich das verhindern?
Bitte verwenden Sie ausschließlich guided Transport. Die Kombination aus normaler Transportsurface und guided Transport wird nicht funktionieren.
Wie kann ich ein "Transport Guided (Script)" unterbrechen (durch zB einen Heber) und danach wieder fortführen?
Hier gibt eine Umsetzung in der Demoszene zum guidedTransport, welche als Vorlage genutzt werden kann. (realvirtual/Scenes/DemoGuidedTransport)
Wie kann ich eine "Guideline" bei einem Transportsystem mit zwei "Transport Surfaces" einfügen?
Ein System wie in ihrem Beispiel wird immer nur mit einer Transportsurface umgesetzt, damit kann einfach eine Guideline ergänzt werden. Unity betrachtet immer nur eine "Collision".
Unter main/realvirtual/ui/button1 wird ein image verwendet. Wo finde ich die Datei?
Button-GameObject in der Hierarchie auswählen und im Inspector auf das definierte Bild klicken. Es wird dann im Projekt angezeigt.
Roboter bewegen sich zu bestimmten Positionen deutlich langsamer. Warum ist das so?
Die Bewegung richtet sich nach der langsamsten Achse.
Grüße Christin
Use only guided transport. Combining normal transport surfaces with guided transport will not work.
There is an implementation in the demo scene for guided transport that can be used as a template. (realvirtual/Scenes/DemoGuidedTransport)
A system like the one in your example is always implemented with a single transport surface, allowing an easy addition of a guideline. Unity only considers one "Collision".
Select the Button-GameObject in the hierarchy and click on the defined image in the Inspector. It will then be displayed in the project.
The movement speed is determined by the slowest axis.
Regards Christin

I didn't find the solution for my second question in the demo "DemoGuidedTransport".
I changed it to only TransportGuided (Script) instead of mixing it up but if I lift the MU in front of the stopper then the MU is shaking/jumping on the lifter. Even if the Drive is stopped.
If I change the property "Raycast Length" of "Guided MU (Script)" to 0.1 then it works better but after lowering the lifter again the MU doesn't get moved by the transport system anymore.
The "configurable joint" component of the MU gets destroyed during lifting and doesn't get created after lowering back on the transportsystem in this case.
Any advice would be greatly appreciated.

Hello Andreas,
I have a few points that may also help:
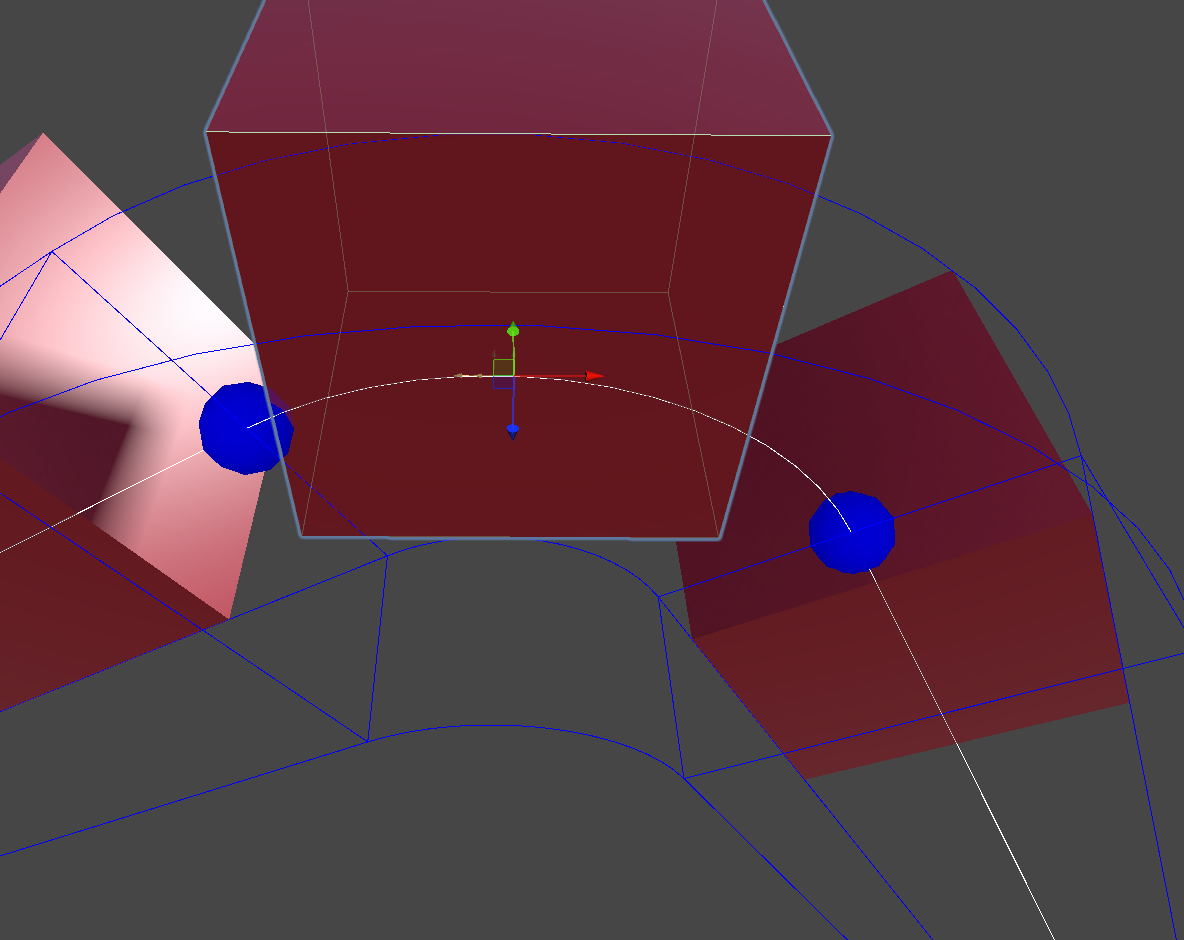
1. Distance between both Rigidbodies in Configurable Joint should be almost zero. Therefore, please check if Part Transform is on the conveyor surface, as in the picture below.
2. For movements with parts such as lifts, I use a reperenting practice. When lift surface collides with part, part is placed as a child of lift. When collider exits part is moved back to pull.
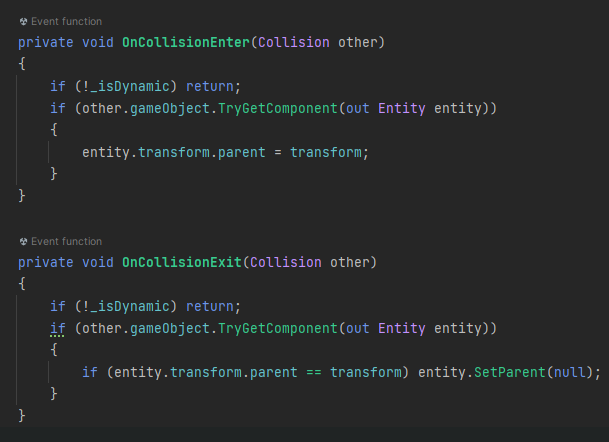
If you can't find a solution, you can contact me at buktop2402@gmail.com

Thank you for your help, Viktor!
It does work out but I don't exactly understand why. Before that I did a work-around with the grip-script. But it felt kinda wrong.
This is the code that I used:
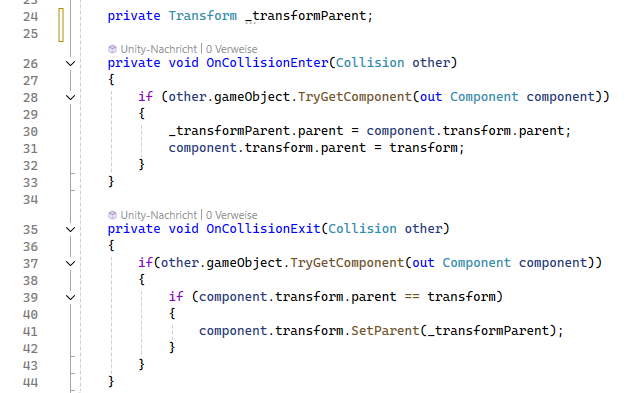
This script is a component of the lifter.
I wanted to keep the parent of the MU and move it back to it after the lifting is done. What happens is that the MUs stay under the original parent gameobject the whole time and are never a child object of the lifter.
As soon as it gets lifted the configurable-joint of the MU gets destroyed and appears back after lifting is done.
But the box colliders of MU and lifter never collide actually. I try to demonstrate it on the following picture.
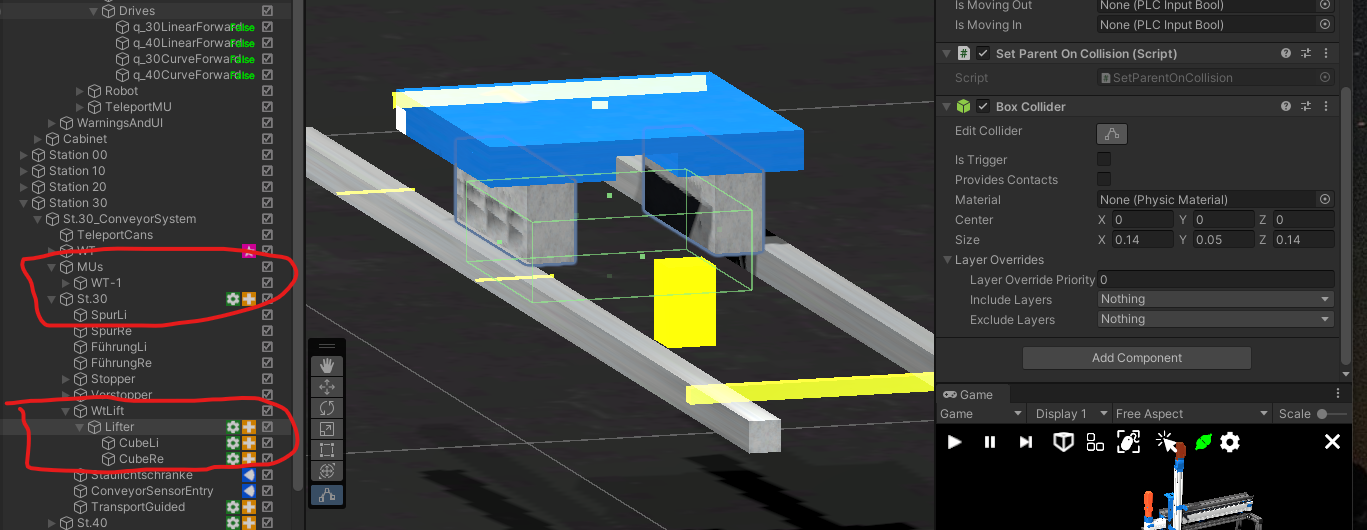
For info it's just an experimental project for demonstrationen purposes. ;-)

Hi Andreas,
This is Thomas from realvirtual. I’m having a bit of difficulty following your current activities and the issues you're encountering. I believe you can achieve your objectives without resorting to scripting.
Here are some key points and basic information to consider:
- Raycast Length: This setting determines the raycast's length for detecting colliders, which is crucial for connecting to guided transports. You may need to adjust this according to your specific geometry.
- Transportsurfaces and GuidedTransports: These components do not perform any reparenting actions.
- Handling Objects: In our tests, we've managed to transfer objects from a TransportSurface and reintroduce them using a Gripper Script. You can refer to this process in our demonstration model located at
Assets/realvirtual/Scenes/DemoLoadingUnloadingGuidedTransport.unity. - Using Multiple Guided Transports: Another approach is to employ an additional GuidedTransport to lift items from an existing one. Check out the example in
Assets/realvirtual/Scenes/DemoGuidedTransport.unity. - Scripts Managing Reparenting: Only the Gripper and Fixer Scripts are designed to manage reparenting and move the MUs out of physical control.
I hope this information is helpful to you.
Best regards, Thomas

Hello Thomas,
I have checked your mentioned demos several times but I still don't understand why it isn't working. I have a guided-transport system and want to stop and lift MUs on it.
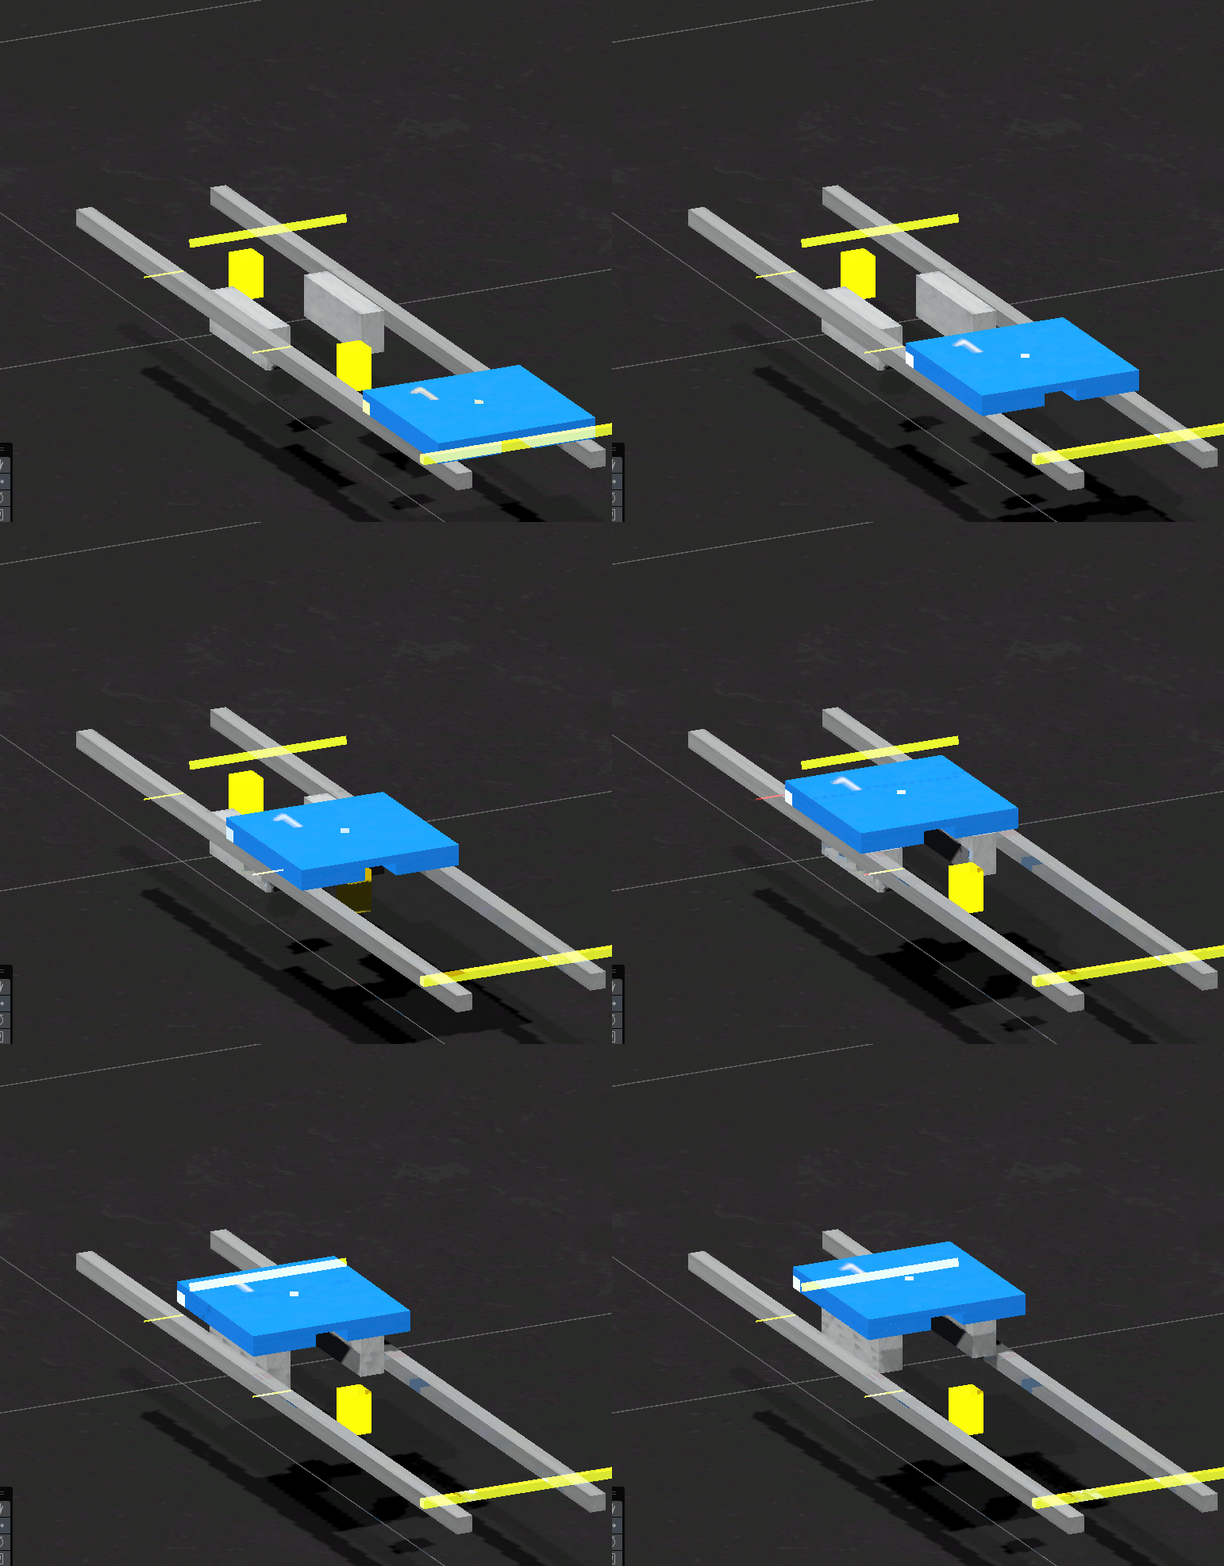
The Problem ist that the MU is shaking during the lift.
What I see is that the 'Configurable joint' component on MU gets detroyed when the lift is done. After lowering the MU back to guided transport the 'Configurable joint' doesn't get recreated and the transport of the MU doesn't work anymore.
I played also around with the Raycast Length of the GuidedMU. But no success.

The shaking occurs because the guided transport system is attempting to keep the Moving Unit (MU) aligned with the line, leading to a logical 'collision' between lifting it and its collider while maintaining alignment with the line. This is the reason for the shaking. Using a normal collider to lift it out will not be effective. Why not use a second guided transport, similar to the lift in the demo scene, to lift it out?

And for the configurable joint - it is destroyed when no guided transport is detected any more and it is only created if a "new" (not the old one again) guided transport is detected.

Good morning,
For some reason I have much trouble with this simple behaviour.
In the demo the box gets lifted out by a drive in linear Y direction. This is what I want without the further guided transport. If I delete the guided transport gameobject in the LiftOut then the lifting stops working.
What Am I missing?

Hello, in this example Box collider and Rigidbody have the default settings. Box collider is not trigger and Rigidbody is not Kinematic. I am not sure how the Guided Transport works now in current version. Please contact the development team directly.

That's the same what I did.
I couldn't make it work with WP lifters and stoppers and using the "Guided Transport (Script)".
I made a work-around with "Transport Surfaces (Script)" and a little own script for alligning the WPs when lifted.
Anyway thank you for your help.
Customer support service by UserEcho


Hallo,
anbei die Antworten zu Ihren Fragen:
Im Umlaufsystem stapeln sich die WTs ab einer Staulänger von 4 Wts. Wie kann ich das verhindern?
Bitte verwenden Sie ausschließlich guided Transport. Die Kombination aus normaler Transportsurface und guided Transport wird nicht funktionieren.
Wie kann ich ein "Transport Guided (Script)" unterbrechen (durch zB einen Heber) und danach wieder fortführen?
Hier gibt eine Umsetzung in der Demoszene zum guidedTransport, welche als Vorlage genutzt werden kann. (realvirtual/Scenes/DemoGuidedTransport)
Wie kann ich eine "Guideline" bei einem Transportsystem mit zwei "Transport Surfaces" einfügen?
Ein System wie in ihrem Beispiel wird immer nur mit einer Transportsurface umgesetzt, damit kann einfach eine Guideline ergänzt werden. Unity betrachtet immer nur eine "Collision".
Unter main/realvirtual/ui/button1 wird ein image verwendet. Wo finde ich die Datei?
Button-GameObject in der Hierarchie auswählen und im Inspector auf das definierte Bild klicken. Es wird dann im Projekt angezeigt.
Roboter bewegen sich zu bestimmten Positionen deutlich langsamer. Warum ist das so?
Die Bewegung richtet sich nach der langsamsten Achse.
Grüße Christin
Use only guided transport. Combining normal transport surfaces with guided transport will not work.
There is an implementation in the demo scene for guided transport that can be used as a template. (realvirtual/Scenes/DemoGuidedTransport)
A system like the one in your example is always implemented with a single transport surface, allowing an easy addition of a guideline. Unity only considers one "Collision".
Select the Button-GameObject in the hierarchy and click on the defined image in the Inspector. It will then be displayed in the project.
The movement speed is determined by the slowest axis.
Regards Christin