Teilen Sie Ihre Erfahrunge und Wünsche mit uns und anderen Usern!

0
Beantwortet

stopping conveyors and having multiple transport surfaces

Nandish gowda vor 2 Jahren in realvirtual.io Starter and Professional aktualisiert vor 2 Jahren 5

Hey I started working on this university project of creating a digital twin of physical model in lab. But I have run into some problems so the idea here is that the MU has to move to the position in front of  gantry drive and then has to comeback on the same conveyor. While coming back, the turn table which is between two conveyors has to turn while also stoping TS which it has. My problems are...

1) Stopping the conveyor with drive sequence at a specific destination and for a chosen conveyor is not working.(professional licence not available for us yet!) I have used PLC signals and sensors, I can start the conveyor drives but cannot stop them.

2) Giving kinematic to conveyors is not working for me hence I have given all drive behaviours directly on CAD. Is there something I have missed for this not working?

3) And I still do not understand the movement of rotating turn table while two separate transport surfaces moving and stopping MU whenever needed. I cannot seem to be able to do them simultaneously. I have seen and tried to use parent drive but it did not work. I have also seen many videos and read manual in website multiple times but giving multiple(linear & rotational) drives and stopping them is still not possible for me.

4) is it possible to rotate the turn table only when coming back and not while moving forward? if yes, any hints to how would be great.

Thank you in advance! Moving MU

0
Beantwortet

Help with model setup

Manish Otto vor 2 Jahren in realvirtual.io Starter and Professional aktualisiert von Support vor 2 Jahren 3

New Setup - Tut 5 test.mp4

Hello,

I'm trying this simple setup of pushing a MU off a conveyor belt with a pusher or deflector. However, as seen in the video, the pusher moves right through the MU. Please help me to change the settings and understand the reasoning behind the same. I'm using the starter pack and have followed the procedures as per the tutorials to date. So all the settings are set to default, or as suggested in the videos. Thanks for your help!

Antwort
Support vor 2 Jahren

Hello,

Please make sure that the MUs and the pusher have sufficient colliders. Nevertheless, the elements must be on certain  layers: MU --> g4aMU; Pusher --> g4aTransport.(set in the inspector) The current parameter of the collider interaction you'll find here: Edit/Projectsettings/Physics.

Let me know if this solves the issue.

0
Beantwortet

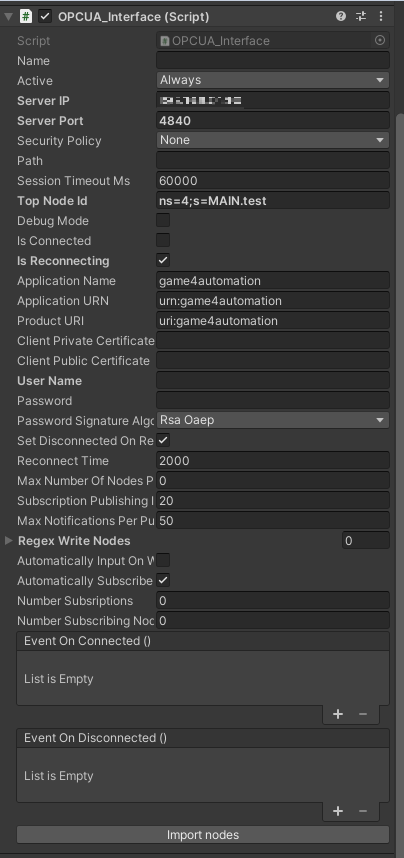
Import nodes remains importing for ever

Elio vor 2 Jahren in realvirtual.io Starter and Professional aktualisiert von Support vor 10 Monaten 3

fallo_opc_prosys.pcapng

Hello all,

My application gets stuck when trying to import nodes in Unity3D from the Prosys OPC UA Simulation Server. It shows a window saying "Hold on... Importing assets", but it never ends. Here is a capture from Wireshark showing the messages exchanged. Any ideas?

Antwort
Support vor 10 Monaten

Hi, we have found a solution for Prosys. It was a problem with the underlying OPCUA library. With this setting we are now able to import (you need to select a topnode). It will be included in the next release (2022.11). Please get in contact with us if you need a beta earlier.

0
Beantwortet

Inspector-items turning grey

Bear vor 2 Jahren in realvirtual.io Starter and Professional aktualisiert von Support vor 2 Jahren 6

Hi,

new here. I looked at the scene "DemoGame4Automation". I want to replicate that in my own project, but have the problem that as soon as I add the "RobotIK"-script and a path and target, all axes under the robot are greyed out. I am also unable to change values in the inspector then. Any solutions to this?

Regards,

Jan

Antwort
Support vor 2 Jahren

Hello,

I have checked your upload.
The definition of the axis within the RobotIK component is missing. (see screenshot below).
Please define it and use the option above to update the drives.
There was also an error message in the console pointing in this direction.

0
Not a bug

Build Error UnityLinker.ex

g straehler vor 2 Jahren in realvirtual.io Starter and Professional aktualisiert von Support vor 2 Jahren 9

When creating a test environment in Unity, I encountered an unsolvable error.
After creating a basic scene using the basic documentation, it can be displayed and controlled flawlessly in Unity play mode. Creating a build of the project for UWP results in the following error code (see below).

Tried solutions for basic scene without add-ons except Game4Automation

Experimental solutions

  • Integration of MRTK-ToolKite 3 and configuration of Unity environment for HoloLens2/UWP
  • Build of a project without Game4Automation only with MRTK3 (works)
  • Removal of unused functions of the Game4Automation software.

Objective for me is to build a S7 TCP/IP Connection with a HoloLens. This works completely in play mode, even in connection with the MRTK 3 toolkit and its functions. For this, the main controller script was modified to have only the interface function. Again, the same error results.

I have made the project available online once with a simple basic scene and with the basic extension for the HoloLens needed for me.

About a feedback\Tips I would be happy.


Failed running C:\Program Files\Unity 2021.3.18f1\Editor\Data\il2cpp/build/deploy/UnityLinker.ex

Build completed with a result of 'Failed' in 20 seconds (19680 ms)
UnityEngine.GUIUtility:ProcessEvent (int,intptr,bool&)

UnityEditor.BuildPlayerWindow+BuildMethodException: 2 errors
at UnityEditor.BuildPlayerWindow+DefaultBuildMethods.BuildPlayer (UnityEditor.BuildPlayerOptions options) [0x002da] in <42a64fd733d9417da1ea3a757ad9a96d>:0
at UnityEditor.BuildPlayerWindow.CallBuildMethods (System.Boolean askForBuildLocation, UnityEditor.BuildOptions defaultBuildOptions) [0x00080] in <42a64fd733d9417da1ea3a757ad9a96d>:0
UnityEngine.GUIUtility:ProcessEvent (int,intptr,bool&)


---------------------------------------------------------------------------------------------------------------------------------------------------------------------------------

Bei der Erstellung einer Testumgebung in Unity ist ein für mich nicht lösbarer Fehler aufgetretten.

Nach dem erstellen einer Grundszene anhand der Grundlagen Dokumentation lässt sich diese einwandfrei im Unity-Playmodus darstellen und kontrollieren. Bei der Erstellung eines Buildes des Projektes für UWP ergibt folgender Fehlercode (siehe unten).


Versuchte Lösungen für Grundszene ohne Add-ons außer Game4Automation

Experimentelle Lösungen

  • Eindung von MRTK-ToolKite 3 und Konfiguration der Unity Umgebung für HoloLens2/UWP
  • Build eines Prokjektes ohne Game4Automation nur mit MRTK3 (funktioniert)
  • Entfernung von nicht verwendenten Funktionen der Game4Automation Software


Zielstellung für mich ist es eine S7 TCP/IP Connection mit einer HoloLens herzustellen. Diese funktioniert vollständig im Playmodus, selbst in Verbindung mit dem MRTK 3 Toolkit und dessen Funktionen. Hierzu wurde das Main Controller Script abgeändert, dass nur noch die Interface Funktion vorhanden ist. Auch hier ergibt sich der gleiche Fehler.

Ich habe das Projekt online zur Verfügung gestellt einmal mit einer einfachen Grundszene und mit der für mich benötigten Grunderweiterung für die HoloLens.

Über einen Rückmeldung\Tipps würde ich mich freuen.

Failed running C:\Program Files\Unity 2021.3.18f1\Editor\Data\il2cpp/build/deploy/UnityLinker.ex

Build completed with a result of 'Failed' in 20 seconds (19680 ms)
UnityEngine.GUIUtility:ProcessEvent (int,intptr,bool&)

UnityEditor.BuildPlayerWindow+BuildMethodException: 2 errors
at UnityEditor.BuildPlayerWindow+DefaultBuildMethods.BuildPlayer (UnityEditor.BuildPlayerOptions options) [0x002da] in <42a64fd733d9417da1ea3a757ad9a96d>:0
at UnityEditor.BuildPlayerWindow.CallBuildMethods (System.Boolean askForBuildLocation, UnityEditor.BuildOptions defaultBuildOptions) [0x00080] in <42a64fd733d9417da1ea3a757ad9a96d>:0
UnityEngine.GUIUtility:ProcessEvent (int,intptr,bool&)

Antwort
Support vor 2 Jahren

There first error is about I18N - please check if folder Tools/ZIP is in our project and delete that (and every code which is using ZIP - it is not essential needed)

0
Beantwortet

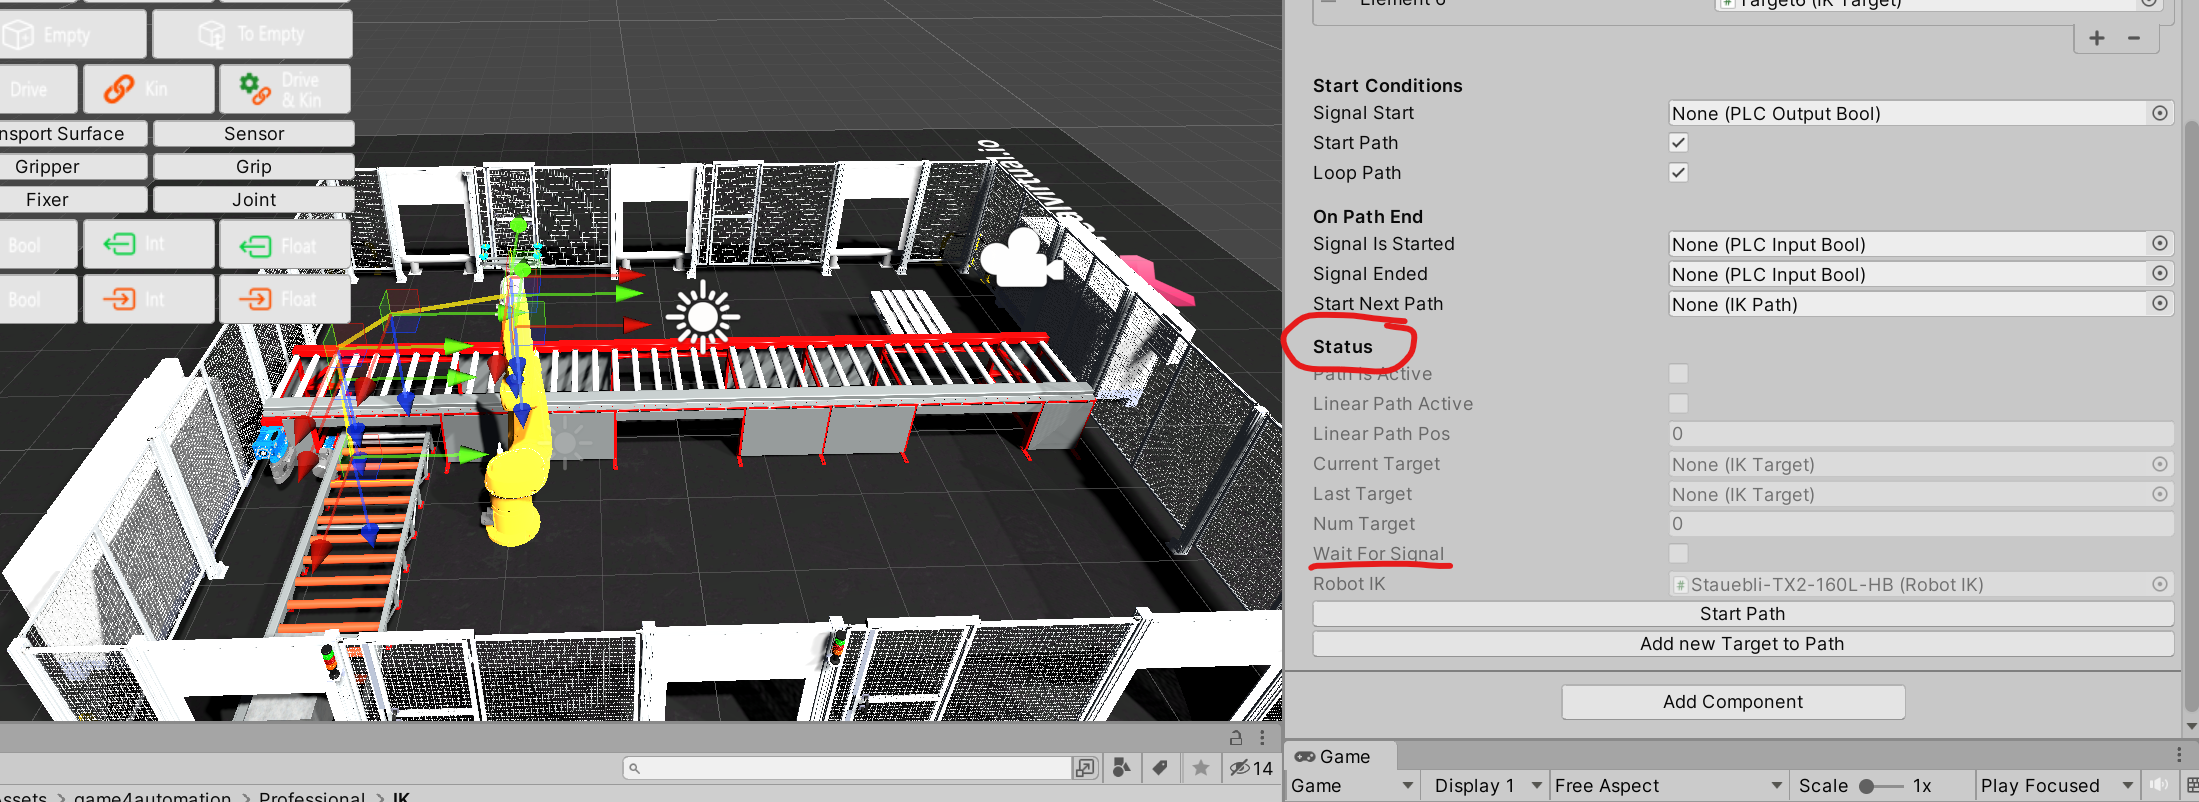
Why the jump at each target in a path ?

VIZtech4 vor 2 Jahren in realvirtual.io Starter and Professional aktualisiert vor 2 Jahren 5

Using professional version.

I followed the tutorial in this video,  "Tutorial - realvirtual.io - Inverse robot kinematic with Unity",  because I could see the robot jump back at each new target in a path.

Having finished the tutorial myself in Unity, I can see that the jump is real especially when the speed override is very slow.

Why does it jump and how can this be prevented. ? it is causing us a lot of grief.

Even in Edit mode when adding a new target to a path, the robot jumps back from the target at the start.

I would expect the target and TCP to both be in the same place and that would solve the problem, I find it very dissapointing that such a discrepancy exists in what is made out to be a professional product.

Thank you.


.

Antwort
Support vor 2 Jahren

We have implemented a correction value for each target to address the inaccuracies in the inverse kinematics (ik) algorithm. In edit mode, the user must press the SetCorrection button (multiple times, if necessary) while the robot is positioned at the target. This action calculates the difference between the desired position and the actual tool center point (tcp) position, taking into account any inaccuracies in the algorithm. The correction value will then be applied to future movements along the defined paths. I am sending a patch in a private message for review; if it is deemed acceptable, it will be included in the next release.

Image 828


0
Beantwortet

drive CurrentPosition() in IK mode issue

VIZtech4 vor 2 Jahren in realvirtual.io Starter and Professional aktualisiert vor 2 Jahren 8

Using professional version.

When driving a robot arm around in Axis mode using a joystick, dirve CurrentPosition reports the correct angles.

However when in IK mode, the returned values change sign at the 180 position.

How can I get proper angle values in IK mode ?

Antwort
Support vor 2 Jahren

Hi, the solver will not get any values greater or lower than -180 or +180  because with this solutions all possible positions can be described. 

0

Ethernet IP AB Control logix "path". Im used to CIP paths, but its format doesnt seem to work.

I am wanting to connect to a AB Control Logix. I have IP, PLC type and a CSV file creating one test variable (float). When I test communication. It has a error. [EthernetIP - Error in connecting to PLC, please check your connection settings!] The only variable is the PATH. PATH has no explanation in documentation. I am used to CIP path, but that format doesnt seem to work. In my test rack I have a L83 processor, with built in ethernet, in slot 0. IP I can ping and connect with software. Just trying to set up a use case demo. I have a stand alone ethernet card I could use but dont think thats the issue.
I've tried 1,0   0,0  1,1  same error.

0
Fertiggestellt

Suggestion regarding DriveToTarget()

VIZtech4 vor 2 Jahren in realvirtual.io Starter and Professional aktualisiert von Support vor 2 Jahren 2

I found it useful to change DriveToTarget to this;

public bool DriveToTarget(IKTarget target)

it returns true if the target was reachable otherwise false

Antwort
Support vor 2 Jahren

Hi, thanks for the suggestion - we will implement that for the next release (in the next 2 weeks).

0
Not a bug

SetDriveTransformToValue issue

VIZtech4 vor 2 Jahren in realvirtual.io Starter and Professional aktualisiert von Support vor 2 Jahren 4

I have Rotation Drives on the pivots of a robot arm.

To set a 'pose' position I am using "SetDriveTransformToValue" with an angle parameter for each drive.

That part works, however when I then use "drive.CurrentPosition" it gives me the wrong answer and also the limits become in the wrong place.

I tried using "drive.Offset" and "drive.DriveReset" but these did nothing.

The drive transform in Unity Editor does show the correct angle, it's the CurrentPosition that seems to be the problem or it may be I am not using it correctly.

Antwort
Support vor 2 Jahren

Hi, for setting a Drives position from external code you should just use Drive.CurrentPosition = NewPosition.

This will directly set the new position. You should use it in FixedUpdate and if you want to have a smooth movement you need to take care on your own about the interpolation. 

The methods you used are misleading (and even not used from our side) - we will delete the in one of the next releases.